DMARC with quotes or without? [SOLVED]

Does my DMARC record need to include quotation marks or not?

9/10 times, no quotes are needed.

However, this all depends on where you edit your DNS.

In the raw DNS zone file, which is what is passed from machine to machine, the .txt record DOES need to be enclosed in quotation marks if it contains spaces. It is unlikely that your domain/DNS provider however will give you direct edit access to this, and instead will be providing their own interface to edit entries with pre-built in quotation marks. Exceptions to this can be found when directly editing via CLI at the root of a server, or when using the raw edit mode on WHM.

For example, Cloudflare will automatically wrap any string of text in a .TXT record in quotes for you, and remove extra quotes you may add,

namesco however will not automatically remove extra quotations to their already provided ones – which could lead to double quotations, and issues further down the line.

It pretty much boils down to your provider, it is best to have a quick skim of their DNS Q&A section – or to test by trial and error!

My favorite testing site is currently https://mxtoolbox.com/DMARC.aspx

Powershell Migration Series | Setting bulk forwarding using powershell

Powershell Migration Series

Setting bulk forwarding using powershell

Whilst doing my migration, i want to set up the mailbox so that i can forward any new massages to O365 from the local exchange, after i have done the bulk of mail migration. In order to do this, we utilise the .onmicrosoft.com address space that O365 can provide each email user.

The plan is simple, forward mail from local exchange @contoso.com to O365 @contoso.onmicrosoft.com

Once you have created the contacts, the next step is Setting bulk forwarding using powershell

1) Create another CSV, this time in the following format,

DisplayName,MailAddress

DisplayName = the username in exchange, e.g. “Joe Bloggs”
Mail Address = Forwarding address @contoso.onmicrosoft.com address

Save it as “ForwardingAddresses.csv”

2) Run the following which creates the bulk forwarding using powershell

Import-Csv c:\scripts\ForwardingAddresses.csv | Foreach-Object{Get-Mailbox $_.DisplayName | Set-Mailbox -ForwardingAddress $_.MailAddress}

Now for me, i needed it to deliver to both the exchange mailbox and to forward to the O365 mailbox, if you need it to deliver to the mailbox AND forward, add the below switch to the end of the above before the last curley bracket }

-DeliverToMailboxAndForward $true

Final script i ran:

Import-Csv c:\ws\ForwardingAddresses.csv | Foreach-Object{Get-Mailbox $_.DisplayName | Set-Mailbox -ForwardingAddress $_.MailAddress -DeliverToMailboxAndForward $true}

Setting bulk forwarding using powershell

Powershell Migration Series | Creating bulk contacts with powershell

Powershell Migration Series

Creating bulk contacts with powershell

Whilst doing my migration, i want to set up the mailbox so that i can foward any new massages to O365 from the local exchange, after i have done the bulk of mail migration. In order to do this, we utilise the .onmicrosoft.com address space that O365 can provide each email user.

The plan is simple, forward mail from local exchange @contoso.com to O365 @contoso.onmicrosoft.com

To do so, on the local exchange there is two steps,

1) create CSV with the following format and your contact data:

Firstname,LastName,ExternalEmailAddress

Save as external_users.csv

2) Run the following which creates the bulk contacts with powershell

Import-Csv “C:\scripts\external_users.csv” | ForEach {New-MailContact -Name $_.Name -Firstname $_.FirstName -LastName $_.LastName -ExternalEmailAddress $_.ExternalEmailAddress -OrganizationalUnit “DOMAIN.local/MyBusiness/Users/SBSUsers/Contacts”}

replace: “DOMAIN.local/MyBusiness/Users/SBSUsers/Contacts” with the OU you wish the contacts to be created in.

Creating bulk contacts with powershell

You then need to set up the forwarding within exchange, now you have already done the contacts using powershell, why not set forwarding with powershell also?

Purge deleted users from Office 365 (O365)

On occasion you may have to force a deletion of a user, or perhaps a user has been deleted but you need to assign that old email address to someone else.

This is when you need to purge deleted users from Office365.

To do so you need to open up powershell and connect to your office 365 tennancy – you can use connect-msolservice to do so,

Next check which deleted users are currently in the recycle bin:

Get-MsolUser -ReturnDeletedUsers

If there is only one, or you wish to remove all users that have been listed:

-ReturnDeletedUsers | Remove-MsolUser -RemoveFromRecycleBin -Force

If you only want to delete and purge a single user from the Recycle bin – you can use the below:

-ReturnDeletedUsers |Remove-MsolUser -UserPrincipalName “[user’s email address]” -RemoveFromRecycleBin -Force

Sorted, you can now re-use the smtp address or recreate the user. for other ways to Purge deleted users see future posts.

Change the username in O365 when syncing with onsite active directory

When creating a new user in Office365 with a hybrid or active directory syn’d setup it is quite common for Office365 to append the .onmicrosoft.com domain to any new address you set up.

This unfortunately cannot be changed by means of GUI, you need to change the username in O365 using powershell.

To change the username in Office 365: 

1. Make sure you have the WAAD module
2. Run PowerShell
3. Type “Connect-MsolService” –> ENTER. Enter your admin credentials for Office 365 –> OK
4. Use the below command to update the primary email address used to log in exchanging parts in bold;

"Set-MsolUserPrincipalName -UserPrincipalName current_email@****.onmicrosoft.com –NewUserPrincipalName new_email@domain"  

Nice and easy 🙂

Change message size limits in exchange 2016

There is the odd occasion that you may need to change the allowed message size limits in exchange, either to send or to receive – below we look specifically at self hosted Exchange 2016

First, open up Exchange powershell, and and enter any required domain credentials.

Next we are going to view the current message limits on the server by the following multiline command:

get-transportconfig | ft maxsendsize, maxreceivesize
get-receiveconnector | ft name, maxmessagesize
get-sendconnector | ft name, maxmessagesize
get-mailbox Administrator |ft Name, Maxsendsize, maxreceivesize

Once armed with this information we can proceed to string together a command in order to get the desired messages allowed through the system. The main command is the below:

get-transportconfig | Set-TransportConfig

This calls the transport layer configurations and allows you to pipe changes to it. Next we have the different set commands for different limits;

-maxsendsize 30MB -maxreceivesize 30MB; get-receiveconnector | set-receiveconnector -maxmessagesize 30MB; get-sendconnector | set-sendconnector -maxmessagesize 30MB; get-mailbox | Set-Mailbox -Maxsendsize 30MB -maxreceivesize 30MB

From the above, you can pick and choose what you need to change the message size limits, as in the example, this will set ALL connectors ingoing and outgoing to 30MB. The full command will look something like the below:

get-transportconfig | Set-TransportConfig -maxsendsize 30MB -maxreceivesize 30MB; get-receiveconnector | set-receiveconnector -maxmessagesize 30MB; get-sendconnector | set-sendconnector -maxmessagesize 30MB; get-mailbox | Set-Mailbox -Maxsendsize 30MB -maxreceivesize 30MB

Connect to O365 using Powershell (Windows Azure Active Directory Module )

So you need a quick way to connect to o365 to manage email for either yourself or your clients?

Connect to O365 using Powershell (Windows Azure Active Directory Module )Load up the Azure Directory module, link below:
http://go.microsoft.com/fwlink/p/?linkid=236297

Type (or copy/paste):
$msolcred = get-credential
connect-msolservice -credential $msolcred


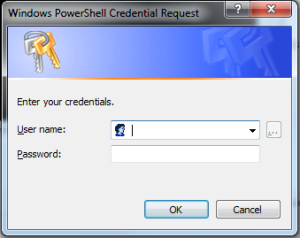
It will then prompt for your Office 365 administrators user/pass.
Hit enter,

You are now connected to your admin console and can now use a whole host of available cmdlets in order to quickly and effectively manage your exchange and Office365 back-end.

See <link to post> for my Top Five Office 365 Powershell commands


Which Exchange services to restart without needing a server reboot

Here is which exchange services to restart in order to completely refresh an on-site exchange installation

1) Microsoft Exchange Active Directory Topology Service (this will toggle all the core AD Exchange services minus the below)

2) Microsoft Exchange Information Store

3)Microsoft Exchange System Attendant

exchange services

With all that complete you should be all ready to go and continue trouble shooting/upgrading/modifying whatever it was you need to work on. Hopefully though if you hd any issues, this should have resolved them for you.

Top 5 Obvious but little known useful cmdlets and IT support tricks

As an IT technician, I am often adding new quick tricks to my mental shorcuts list, here are my current top 5:

  1. Need to log onto a domain as the local PC admin but don’t know the PC name?
    Simply use ” .\” at the start of the admin username to log on as a local PC user.
  2. Powershell if PC has trust relationship
    Test-ComputerSecureChannel –Server *dc name* -Verbose
  3.  shutdown /i (-i ) remote shutdown
  4. Create big dummy file:
    Cd \sysinternalssuite
    Contig -n 2gbEmptyFile.txt 20000000
  5. For Spooler Crashes, first try below to clear all jobs
    net stop spooler
    pause
    del /S /F “C:\Windows\System32\spool\PRINTERS\*”
    net start spooler
    pause

::end