AI News Roundup: China’s Manus AI, Google’s AI Search, OpenAI Slowdown & More – NR’s Fortnight in AI
Let’s quickly sprint through the most interesting AI headlines that caught my eye over the last couple of weeks. It’s a fast-moving field, so let’s get you up to speed as of the 18th of March 2025.
Manus AI (China): Is China Catching Up?
A new AI agent from China called Manus is going viral, raising questions about China’s AI progress relative to the US. Is the AI landscape shifting?
Google is testing “AI Mode” search results powered by Gemini 2.0, bypassing traditional web links for conversational AI responses. A major shift in online information access?
Reports suggest a potential slowdown in OpenAI’s rapid AI improvement, with their next model “Orion” possibly not showing the same leap forward. Are we seeing a plateau?
Anthropic Claude 3.7 Sonnet: Thinking Longer, Reasoning Deeper
Anthropic released Claude 3.7 Sonnet, designed for longer thinking and enhanced reasoning over larger information volumes. Reasoning capabilities are becoming crucial for advanced AI.
The Musk vs. OpenAI legal case continues with interesting findings regarding Musk’s efforts to prevent OpenAI’s for-profit transition. Legal, ethical, and governance issues remain central in AI.
Boost Your SMB with AI: Microsoft Copilot SMB Success Kit – Actionable Guide & Security Focus
In this post, I’m digging into actionable insights for businesses, especially IT providers, looking to leverage AI. This posts focus: the Microsoft “Copilot for SMB Success Kit.”
Microsoft has launched a suite of resources to help IT providers, or SMB’s smoothly onboard AI, specifically Copilot, into small and medium-sized businesses.
The key takeaway? Security first! Microsoft emphasizes a “security-first” approach, providing a robust framework for SMBs to confidently adopt AI. Let’s break down the key actionable steps.
Security First Focus: Prioritizing security for SMBs adopting AI like Copilot.
SharePoint Security Recommendations: Adjusting SharePoint search allow lists and tightening sharing permissions for Copilot readiness.
Phased Copilot Rollout: Strategic, phased deployment starting with high-value use cases and early adopters.
Microsoft 365 Security Apps: Considering additional security apps based on specific business needs.
New Setup Guide in Admin Center: Utilizing the new step-by-step guide for Copilot setup in the Admin Center.
Customisation is Key: Leveraging plugins and custom copilots for unique business needs.
Real-World SMB Benefits: Exploring practical benefits like meeting summaries, document summarization, and nuanced communication.
If you’re an IT provider, business owner or helping SMBs or your own company with AI, the “Copilot SMB Success Kit” and it’s components are a must-read. It offers practical advice and resources for a smoother and more secure gen AI adoption for you, your business or your clients.
Should You Be Nice to AI? Exploring the Politeness Principle
The question of whether we should extend courtesies to AI might seem like fodder for a science fiction novel. Yet, with the rise of sophisticated Large Language Models (LLMs) like ChatGPT, Grok, Gemini, Copilot, Claude and others, it’s a question that’s becoming increasingly relevant – and surprisingly, there might be practical benefits to doing so. I’ve read up on some recent research so here is my take on what I think is a very interesting topic.
The “Emotive Prompt” Experiment: Does It Really Work?
Their findings, focusing on summarization tasks in English, Chinese, and Japanese, revealed some intriguing patterns. While the accuracy of summaries remained consistent regardless of prompt politeness, the length of the generated text showed significant variation.
In English, the length decreased as politeness decreased, except for a notable increase with *extremely* impolite prompts. This pattern, mirrored in the training data, reflects human tendencies: polite language often accompanies detailed instructions, while very rude language can also be verbose. Interestingly, GPT-4, considered a more advanced model, did not exhibit this surge in length with impolite prompts, possibly indicating a greater focus on task completion over mirroring human conversational patterns.
The study also highlighted language-specific nuances. In Chinese, moderate politeness yielded shorter responses than extremely polite or rude prompts, potentially reflecting cultural communication styles. Japanese results showed an increase in response length at moderate politeness levels, possibly linked to the customary use of honorifics in customer service interactions.
The Mechanics Behind the “Magic”
So, what is going on here? How do LLMs actually respond? Here are the key aspects of LLMs and how they work, that could explain why prompts can affect the output from an LLM:
Pattern Recognition: LLMs are trained on vast datasets of human text. They learn to associate polite phrasing (“please,” “thank you,” “could you…”) with requests for information or assistance. This association becomes part of the model’s learned patterns.
Probability Shifts: Emotive prompts can subtly alter the underlying probability calculations within the LLM. It’s like nudging the model towards a different “branch” of its decision tree, potentially activating parts of the model that wouldn’t normally be engaged.
Data Bias (Implicitly): The datasets used to train LLMs inherently contain biases. Polite language is often associated with more thoughtful, detailed responses in human communication. The AI, in a sense, mirrors this bias.
My Perspective: Prudence and Respect in the AI Age
While the science is interesting, I like to add a bit of a philosophical angle. I’m a firm believer in treating AI with a degree of respect, even if it seems irrational at present. My reasoning? We simply don’t know what the future holds. As AI capabilities rapidly advance, it’s prudent to establish good habits now. Perhaps not fully fledged “Kindness” as a human term, but certainly show a degree of “respect” and etiquette.
Consider it a form of “Pascal’s Wager” for the AI era. If sentience ever *does* emerge, wouldn’t you prefer to be on the good side of our potential AI overlords? It’s a low-cost, high-potential-reward strategy.
That said, I’m not advocating for subservience. We should maintain a clear user-AI dynamic. Clear, respectful communication – with a touch of authority – is key. Think of it like interacting with a highly skilled, somewhat unpredictable specialist. You’re polite, but you’re also in charge.
Practical Approaches: Combining Politeness with Clarity
Here are some practical ways to incorporate politeness into your AI interactions:
Basic Courtesies: Use “please” and “thank you” where appropriate. It costs nothing and might subtly improve results.
Precise Language: The more specific and well-defined your prompt, the better the AI can understand your needs. Politeness shouldn’t come at the expense of clarity.
Positive Framing: Frame requests positively (“Please provide…” rather than “Don’t omit…”). This often aligns better with the training data.
Acknowledge Output: A simple “Thank you, that’s helpful” can reinforce positive response patterns.
Beyond “Niceness”: The Broader Context
The “politeness principle” is just one facet of effective AI interaction. We’re still in the early days of understanding how to best communicate with these systems. As LLMs become more powerful and versatile, control and flexibility also become increasingly important.
Running AI locally, rather than relying solely on cloud-based services, is an important step. It allows you to experiment, tailor the model to your specific needs, and maintain greater control over your data. I previously detailed how you can use free, responsive AI with GaiaNet and ElizaOS – a powerful, cost-effective alternative to commercial offerings.
Underlying all of this is, of course, the hardware. Powerful GPUs are essential for running these advanced AI models. If you’re interested in the intersection of hardware and AI, particularly in the context of server environments, check out my post on GPU support in Windows Server 2025. The hardware is still critically important in deploying an effective solution.
Conclusion: A Thoughtful Approach; Just Be Nice!
Treating AI with respect – incorporating politeness and clear communication – is likely a good practice. It may subtly improve results, aligns with good communication principles in general, and, perhaps, prepares us for a future where AI plays an even larger role in our lives. It’s a small gesture, but one that reflects a thoughtful and proactive approach to this rapidly evolving technology.
Tired of escalating OpenAI bills but still crave a powerful AI companion? ElizaOS, the open-source AI platform, has got you covered. By integrating with GaiaNet’s public nodes, you gain access to a variety of large language models (LLMs) – for free! These aren’t some underpowered toys, either. Many are highly responsive and capable, offering a compelling alternative to paid services. Let’s dive into how you can easily set this up.
What is GaiaNet?
GaiaNet is a decentralized network of compute resources specifically designed for running AI models. Think of it like a community-driven cloud for LLMs. They make many models available to the public for free via their public nodes. This allows anyone to access cutting-edge AI without the usual hefty price tags. The responsiveness of these models might surprise you, providing a smooth and engaging conversational experience.
Why Choose GaiaNet with ElizaOS?
Cost-Effective: The most obvious advantage is the cost – zero! Say goodbye to usage-based fees.
Variety of Models: GaiaNet hosts a selection of different LLMs, each with unique strengths.
Privacy Focus: As a decentralized network, GaiaNet can offer increased privacy compared to centralized services.
Open and Accessible: You can contribute to the network and even run your own node eventually.
How to integrate GaiaNet with ElizaOS Agent: Step-by-Step
Ready to give it a go? Here’s how to configure ElizaOS to use GaiaNet public nodes:
1. Understanding the Node URLs:
Before diving into the settings, let’s get familiar with what GaiaNet offers. As of this writing, the official docs show a couple of public nodes. You’ll have access to nodes for different model sizes, labeled as SMALL, MEDIUM, and LARGE, using different models like llama3b, llama8b or qwen72b. These are just default settings, you can use other models from the doc. Each of these nodes has an associated URL. For example:
The .env file is where ElizaOS stores its configuration variables. Locate this file in your ElizaOS directory (usually in the root folder). Now, you’ll need to add or modify the following lines (example based on your provided example) to point to the desired GaiaNet public nodes:
GAIANET_MODEL and GAIANET_SERVER_URL: These settings directly control the default model being used by your ElizaOS instance. For testing, you may want to use smaller models to see that everything is hooked up properly, then change to the larger models later.
SMALL_GAIANET_MODEL, MEDIUM_GAIANET_MODEL, LARGE_GAIANET_MODEL and SMALL_GAIANET_SERVER_URL, MEDIUM_GAIANET_SERVER_URL, LARGE_GAIANET_SERVER_URL: These are optional, but will allow you to easily switch between model sizes, from your character.json, and still use the gaianet provider.
GAIANET_EMBEDDING_MODEL: This is the embedding model that will be used.
USE_GAIANET_EMBEDDING: Leaving this empty will use the local embedding model. Setting this to TRUE will use the gaianet embedding model.
Use the v1 endpoint as in the example for the LLM model URL.
Be mindful of rate limits: These public nodes are a shared resource. If you encounter errors, try waiting before re-trying.
3. Updating your character.json:
Now, you need to tell your ElizaOS character to use the GaiaNet model. Open your character’s JSON configuration file. Find the "modelProvider" field and change it to:
"modelProvider": "gaianet",
You can also change the model size by passing a “modelSize” in your json:
"modelSize": "small",
This will override the default model you specified in the .env file, and will instead use the SMALL config. If you do not set modelSize, the default model in your .env file will be used. You can select from “small”, “medium”, and “large”.
4. Restart ElizaOS:
After making these changes, restart your ElizaOS instance for the new settings to take effect.
Testing and Tweaking:
Once restarted, try interacting with your character. If all went well, you should experience a conversation powered by the selected GaiaNet model!
Experiment with different models and find what works best for your specific use case. If you encounter an issue, make sure to double check your .env file and the URL that you have pasted in, as well as the model size in your character config.
Conclusion
Integrating GaiaNet public nodes into ElizaOS is a game-changer for anyone looking for a free, capable, and open-source AI solution. By following these simple steps, you can unlock the power of large language models without worrying about constant usage fees. So, what are you waiting for? Dive in and start experiencing the world of open AI!
Share your experiences with GaiaNet and ElizaOS in the comments!
If you found this guide helpful, consider sharing it with others in the ElizaOS community.
Explore the GaiaNet documentation for more advanced features and options.
What Are the Differences Between Microsoft Defender for Office 365 P1 & P2?
When it comes to protecting your organisation from email-based threats, Microsoft Defender for Office 365 is a leading solution. But with two plans available — Plan 1 (P1) and Plan 2 (P2) — it can be difficult to know which is the best fit for your business. In this article, we’ll compare the two plans and help you decide if the additional features in Plan 2 are worth the higher cost.
Key Differences Between Plan 1 (P1) and Plan 2 (P2)
Feature
Plan 1 (P1) £1.64 user/month
Plan 2 (P2) £4.10 user/month
Protection Against Phishing
Yes
Yes
Anti-Spam Protection
Yes
Yes
Safe Links
Yes
Yes
Safe Attachments
Yes
Yes
Threat Intelligence
Yes
Yes
Attack Simulator
No
Yes
Automated Investigation and Remediation
No
Yes
Advanced Threat Protection Reports
No
Yes
Custom Policies for Safe Links
No
Yes
Advanced Threat Hunting
No
Yes
Real-time Threat Detection
No
Yes
Plan 1: Essential Protection for Office 365
Plan 1 provides essential protection against common email threats like phishing, malware, and spam. Here’s what you get with Plan 1:
Protection Against Phishing: Helps to identify and block phishing attacks targeting your users.
Anti-Spam Protection: Blocks unwanted email and protects against spam.
Safe Links: Provides real-time protection by scanning URLs in email messages to prevent users from clicking on malicious links.
Safe Attachments: Scans email attachments for potential threats and isolates them for analysis.
Plan 1 is ideal for businesses that need basic email protection and are using Microsoft 365 services for communication and collaboration.
Features Only Available in Plan 2
Plan 2 builds on the protection offered in Plan 1 and adds additional advanced features for organisations that need more sophisticated defences. In addition to everything in Plan 1, Plan 2 includes:
Attack Simulator: Helps simulate real-world phishing attacks to test your organisation’s security awareness and training.
Automated Investigation and Remediation: Automatically investigates and remediates threats to reduce manual intervention and improve response times.
Advanced Threat Protection Reports: Provides in-depth reporting on threats targeting your organisation.
Custom Policies for Safe Links: Customises the protection of URLs to suit your organisation’s specific security needs.
Advanced Threat Hunting: Allows you to proactively search for and identify potential threats within your environment.
Real-time Threat Detection: Detects and responds to advanced threats in real time, ensuring quicker mitigation.
Plan 2 is designed for organisations that require more advanced protection and want automated security management, as well as additional tools for threat investigation and prevention.
These exclusive capabilities make Plan 2 the go-to choice for businesses that need more control over their email security and quicker, more efficient responses to emerging threats.
Is the Extra Cost for Plan 2 Worth It?
Choosing between Plan 1 and Plan 2 depends on the needs of your organisation, your budget, and the level of protection you require. Here’s a quick breakdown:
Plan 1: Best for smaller organisations or those who only need essential protection for email security. It’s a cost-effective option that provides solid defences and is included in Microsoft 365 Business Premium and Microsoft 365 E3 licences.
Plan 2: Ideal for larger organisations or those with higher security needs. Plan 2 includes all features of Plan 1 plus advanced protection tools, custom policies, and automation. Plan 2 is available with Microsoft 365 E5 licences.
If your organisation faces a higher risk of targeted attacks, or you need enhanced security and more automation, the additional cost for Plan 2 could be well worth it for the added peace of mind.
When it comes to protecting your business from cyber threats, Microsoft Defender for Endpoint (MDE) is a solid choice. But with two plans available — Plan 1 (P1) and Plan 2 (P2) — it can be tough to know which one is right for your organisation. In this article, we’ll break down the differences between the two plans and help you decide if the extra cost for Plan 2 is worth it.
Key Differences Between Plan 1 (P1) and Plan 2 (P2)
Feature
Plan 1 (P1)
Plan 2 (P2)
Next-Generation Protection
Yes
Yes
Attack Surface Reduction
Yes
Yes
Device Control (e.g., USB management)
Yes
Yes
Endpoint Firewall
Yes
Yes
Network Protection
Yes
Yes
Web Content Filtering
Yes
Yes
Device-Based Conditional Access
Yes
Yes
Centralised Management
Yes
Yes
Application Control
Yes
Yes
APIs and SIEM Connector
Yes
Yes
Advanced Security Reports
Yes
Yes
Endpoint Detection and Response (EDR)
No
Yes
Automated Investigation and Remediation
No
Yes
Threat and Vulnerability Management
No
Yes (with MDVM add-on)
Advanced Threat Hunting
No
Yes
Sandboxing
No
Yes
Managed Threat Hunting Service
No
Yes
Threat Intelligence
Yes
Yes
Microsoft Secure Score for Devices
Yes
Yes
Plan 1: Basic Protection at a Lower Cost
Plan 1 is great for businesses that need essential protection without breaking the bank. Here’s what you get:
Core protection: Defends your devices from malware and other malicious software.
Device control: Manages access to USB devices and other peripherals.
Centralised management: Lets you manage and monitor your devices from one dashboard.
Plan 1 is a good choice for smaller companies or those with less complex security needs.
Plan 2: Advanced Protection for Greater Peace of Mind
Plan 2 takes endpoint security to the next level, offering everything in Plan 1 plus powerful features for businesses that need more advanced protection. These include:
Advanced threat detection and response: Finds and stops advanced threats that could bypass basic security measures.
Automated investigation and remediation: Reduces manual effort by automating threat analysis and response.
Threat and vulnerability management: Identifies and resolves vulnerabilities across your network.
Proactive threat hunting: Actively searches for potential threats before they cause damage.
If your organisation handles sensitive data or faces higher risks, Plan 2 is the better option, offering more comprehensive security tools.
Features Only Available in Plan 2
These are the exclusive features that come with Plan 2 — and they’re crucial for businesses that need extra layers of protection:
Endpoint Detection and Response (EDR): Detects and responds to sophisticated cyberattacks in real time.
Automated Investigation and Remediation: Speeds up incident response by automating security tasks.
Threat and Vulnerability Management: Helps spot and fix security weaknesses before they are exploited.
Advanced Threat Hunting: Proactively searches for hidden threats within your network.
Sandboxing: Safely analyses suspicious files to block potentially harmful content.
Managed Threat Hunting Service: Gives you expert help to track and eliminate emerging threats.
These additional capabilities make Plan 2 a powerful choice for businesses that need top-tier protection and quicker response times.
Is the Extra Cost for Plan 2 Worth It?
The choice between Plan 1 and Plan 2 depends on your company’s size, budget, and security needs. Here’s a quick breakdown:
Plan 1: Ideal for smaller organisations or those with basic security needs. It provides core protection and is included in Microsoft 365 E3/A3 licences.
Plan 2: Best for larger businesses or those that need enhanced security features like automated threat hunting and vulnerability management. Plan 2 comes with Microsoft 365 E5/A5/G5 licences.
If you don’t face significant cybersecurity risks, Plan 1 might be all you need. However, if you’re dealing with sensitive data, have a larger workforce, or need advanced protection, the added cost of Plan 2 could be worthwhile for the peace of mind it offers.
Supported GPUs for GPU Partitioning in Windows Server 2025
Virtualization has transformed IT, enabling us to run multiple VM’s and OS’s on a single server. But for resource-intensive tasks like AI and machine learning, powerful graphics processing is essential. This is where Windows Server 2025’s GPU partitioning comes into play, allowing multiple virtual machines (VMs) to share a single GPU’s power, optimising usage and enhancing workload capacity.
What is GPU Partitioning?
With GPU partitioning, a single physical GPU can be split into multiple virtual GPUs (vGPUs), each assigned to different VMs. This enables simultaneous execution of resource-heavy tasks, like AI and ML workloads, all on a shared GPU—making it a game-changer for high-demand environments.
Supported GPUs
Currently only a handful of NVIDIA GPUs currently support partitioning with Windows Server 2025. Here’s a list of the compatible graphics cards supported for Windows Server 2025 for GPU Partitioning:
GPU Model
Rough Cost (USD)
CUDA Cores
TF32 teraFLOPS or Tensor Cores
Memory (GB)
TDP (Watts)
NVIDIA A2
£1300-1800
1280
40-60
16
40-60
NVIDIA A10
£2300+
8192
275-410
24
150
NVIDIA A16
£2700+
5120 (4x 1280)
4x 40 Cores
64
250
NVIDIA A40
£5100+
10,752
74.8 – 149.6
48
300
NVIDIA L2
Not out yet
n/a
48.3
24
TBD
NVIDIA L4
£2500+
n/a
120
24
72
NVIDIA L40
£7500+
18176
568 | Gen 4 Cores
48
300
NVIDIA L40S
£9700+
18,176
366
48
350
Notes
My pick would be the NVIDIA A16 currently offering what is basically 4 GPU’s on one card already making it ideal for partitioning.
Details for some GPUs, especially newer models, are limited and may change as they become more widely available.
Most of these cards are made for the enterprise market, so don’t go thinking you will suddenly be able to set up 4 gaming PC’s on one server and get good graphic results! Whilst it may be possible, these are designed more around tensor cores, useful for AI and deep learning than Cuda cores, which are more multipurpose.
Windows Server 2025’s GPU partitioning unlocks powerful capabilities for optimising hardware and running demanding workloads. While limited to specific NVIDIA GPUs, it’s a step forward for those looking to enhance their system’s efficiency and boost VM computational power. Understanding which GPUs work best for what workloads will become the next big learning curve!
Windows Server 2025: Enhanced Security, Performance, and Cloud Integration
It’s finally here! Microsoft has unveiled its latest server operating system, Windows Server 2025, and it should provide significant advancements in performance, security, and cloud integration. Below are some of the features that stuck out to me with my first install.
My Top 5 New Features of Windows Server 2025
Block Cloning: This feature significantly improves file copy performance, especially for large files, optimising file operations by copying only modified blocks, reducing I/O and improving performance for large files.
SMB over QUIC: This enables secure access to file shares over the internet, providing faster and more reliable file transfers using native SMB technologies.
Hotpatching: This allows for the application of security updates to running servers with minimal downtime, no more out of hours scheduling of reboots!
GPU Partitioning: This lets you split up GPU resources by allowing them to be divided into smaller, virtualized GPUs, adding GPU resources to a VM? Yes please!.
Enhanced Active Directory: This includes features like AD object repair, optional 32k database page size, and improved security for confidential attributes and default machine account passwords.
Key Features of Windows Server 2025:
Enhanced Security: Robust security measures, including hardened SMB protocols, improved Active Directory, and enhanced protection against cyber threats.
Accelerated Performance: Significant performance boosts for virtualization, storage, and networking, especially for AI and machine learning workloads.
Seamless Cloud Integration: Improved integration with Azure for hybrid and multi-cloud environments, enabling seamless workload migration and management.
Modernized Infrastructure: Support for the latest hardware and software technologies, including NVMe storage and GPU acceleration.
Its just a bit better in every way from Server 2022 – and 100% better than 2012 R2!
Good Azure integration, basic hybrid cloud capabilities
Limited cloud integration, early support for hybrid environments with System Center
Hardware Support
Support for latest hardware, including NVMe and GPU
Support for modern hardware, including NVMe
Support for basic hardware configurations; limited support for emerging hardware like NVMe
In summary, Windows Server 2025 steps up the game with smarter security, better performance, and seamless cloud connectivity. From the efficient file handling with Block Cloning to downtime-reducing Hotpatching, it’s clear this release is built to make life easier for us admins. Adding GPU Partitioning for VM flexibility and enhanced AD features, Microsoft has pushed the envelope to give us a modern, future-proof server OS that seamlessly connects to Azure and Entra.
With all these updates, Windows Server 2025 is a significant improvement over its predecessor, Windows Server 2022, and a massive leap from the now-aged Server 2012 R2. Finally, if you are thinking about upgrading now EOL servers. This one’s worth it!
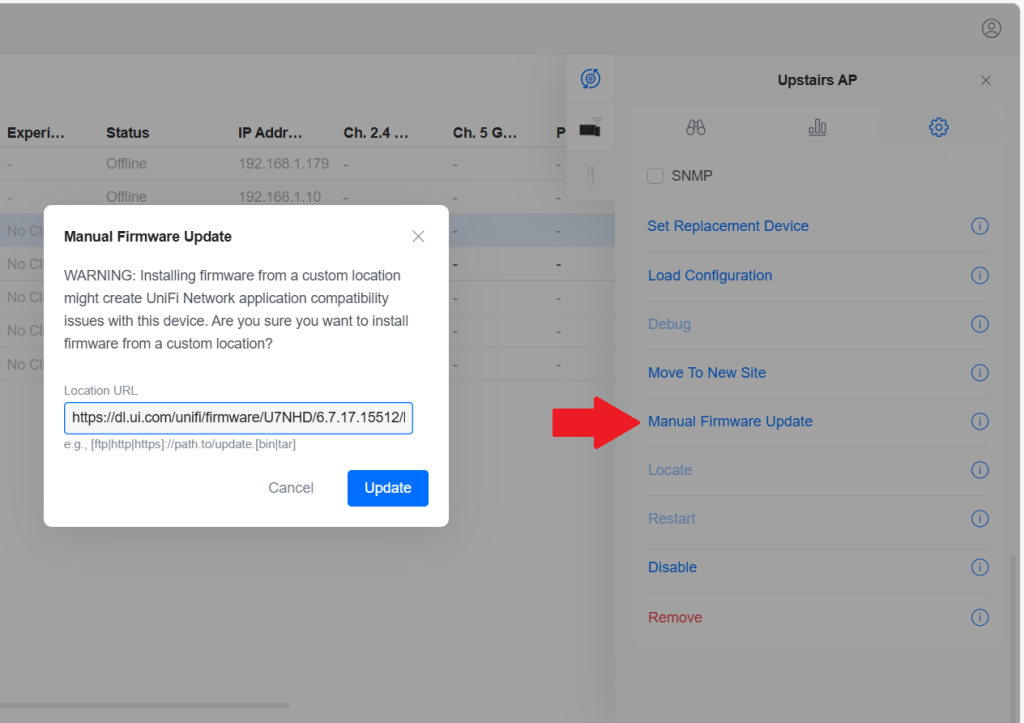
Whilst most AP’s and Unifi devices can be ssh’d into using ubnt/ubnt there are a few exceptions to this rule, for example the UXG-Pro is root/ubnt. Prior to setup/adoption, all devices have a set of default credentials below is what they are as of 06/2024.
Follow these steps to log into Tailscale using Microsoft O365 credentials:
Pre-requisites:
Ensure the PC is connected to the internet.
Confirm that Tailscale is installed.
Locating the Taskbar Icon:
Look for the Tailscale icon in the Windows taskbar, usually near the clock.
Clicking the Icon: A. Click on the Tailscale icon, or right click and select ‘log in’ to initiate the login process. B. If this doesn’t work, check if there is using multiple network interfaces (e.g., Wi-Fi and Ethernet) simultaneously. If multiple interfaces are being used, set the interface’s “Automatic Metric” to manual and enter a value.
Microsoft O365 Sign-in:
A Tailscale login window will appear.
Select the “Sign in with Microsoft” option.
Redirect to Microsoft Login:
The default browser will be opened and redirected to the Microsoft O365 login page.
Use O365 credentials (email and password).
Two-Factor Authentication (if applicable):
If prompted for two-factor authentication, complete the required steps.
Granting Permissions (if applicable):
If windows, or O365 asks to grant permissions, review the requested permissions and click “Allow” or “Accept.”
Connecting to the Network:
After successful login, the Tailscale app will attempt to establish a secure connection to the network.
Check connection
Check if it says ‘connected’ or ‘disconnected’ in the taskbar.