Install multiple programs with Chocolatey

Ever had the need to install multiple programs on a new or existing PC?

We have all been there; a brand new PC out the box, a relative who needs some software installed, a re-install of windows on your own PC.
So how do we go about collating all our software, is there a nice quick way to re-install everything and get us up to date quickly. Well today we are going to go over the basics of how to install multiple programs using Chocolatey.

What is Chocolatey?

From its own site:

Chocolatey is a package manager for Windows (like apt-get or yum but for Windows). It was designed to be a decentralized framework for quickly installing applications and tools that you need.

How can I install chocolatey?

Very easily. Chocolatey is built for windows and use through Powershell, so as long as you have been updating windows, you should be able to install it seamlessly.
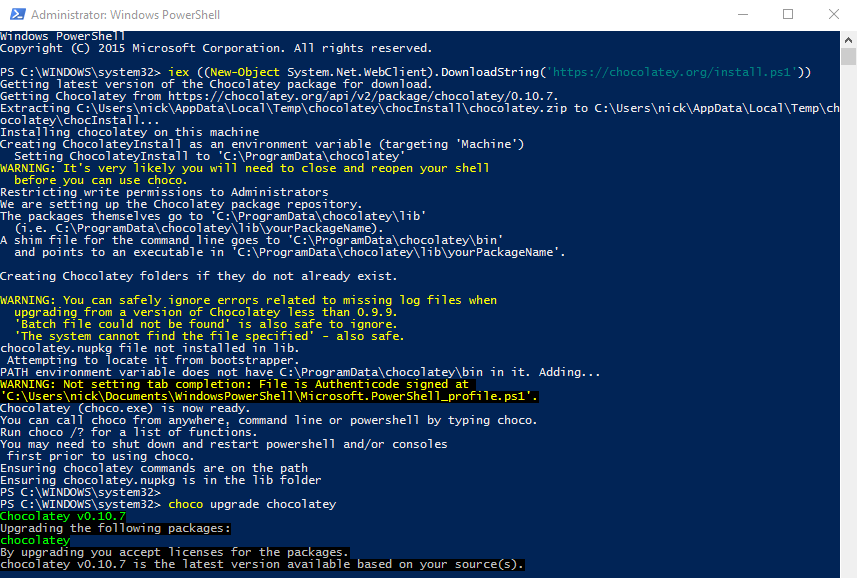
Either head over to the chocolatey install page, or use my favorite method of install – using Powershell itself:

iex ((New-Object System.Net.WebClient).DownloadString('https://chocolatey.org/install.ps1'))

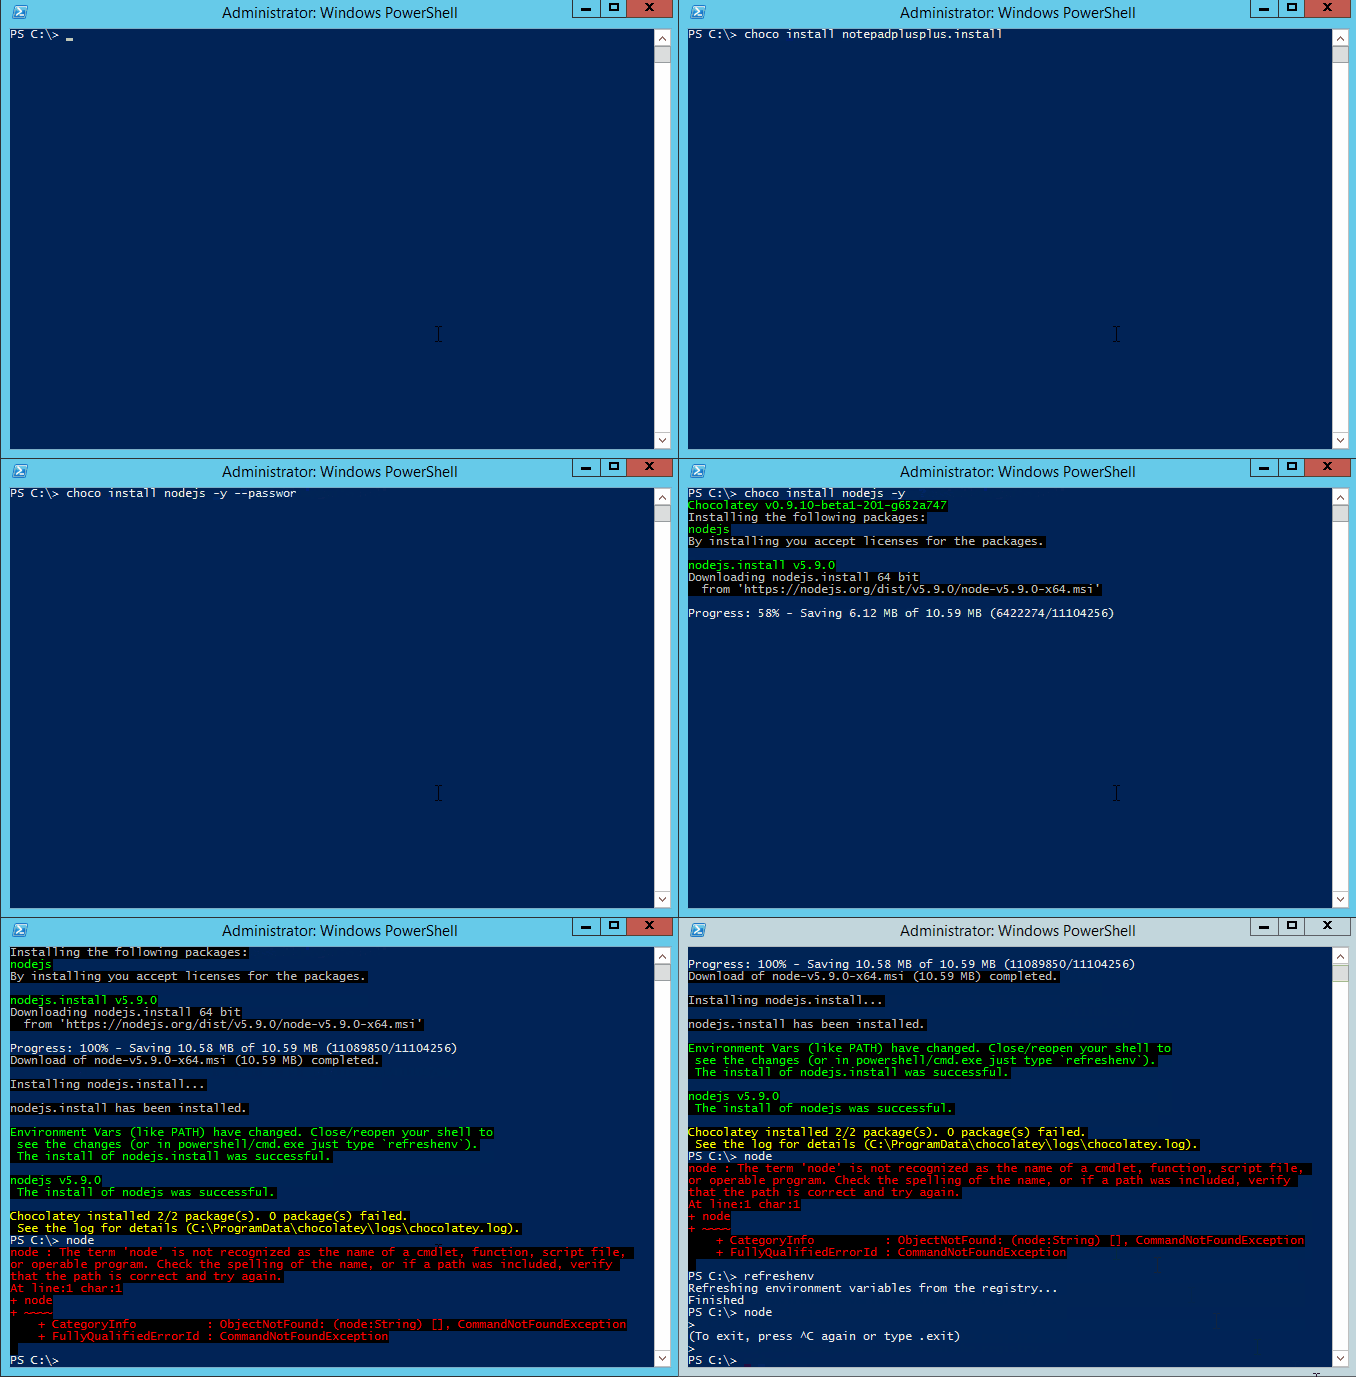
install multiple programs with chocolatey

How to create a multiple install script:

Simply now open powershell and with your new chocolatey powers run the choco install script as follows:
choco install notepadplusplus googlechrome atom 7zip

You can find the full list of programs supported from either running a choco search in powershell, or by visiting the package repository here: https://chocolatey.org/packages

Hope this is of some help. If you are not wanting to install multiple programs, don’t want to mess with powershell as mentioned in previous posts, perhaps Ninite will be better suited for you.

What is Ransomware & how do i stop it?

Ransomware is upon us, but what is this thing, and how can i protect myself or my business from it?

So the definition and description according to Wikipedia is the below:

Ransomware is a type of malicious software that blocks access to the victim’s data or threatens to publish or delete it until a ransom is paid. Any action is possible once device or system is infected and there is no guarantee that paying the ransom will return access or not delete the data.

So how to i prevent and stop Ransomware?

Patch,
Secure,
Backup

>Patch

Patching it often the most overlooked defense in anyone’s arsenal. Patching is as simple as making sure that your windows updates are current and installed, and also checking over other software that you use on a regular basis for updates. Things to keep a keen eye out for, and PDF viewer (Adobe Acrobat, Foxit, Reader DC), Adobe Flash, M$ Office, Web browsers.

>Secure

Securing your PC from Ransomware is as easy as installing a known, tried and trusted AntiVirus software.
Other steps to look into include, adding a firewall to your network, or tighten your current routers firewall settings. Adding Malware protection, using a VPN, locking down user permissions, and a whole lot more.

>Backup

The key to recovering from an infection is a good backup strategy. Backing up is the single most useful thing you can do to prevent falling victim to a ransomware attack. With a good offline backup – or at least a backup to another PC, cloud or server location – the whole process of being infected is alot less of an issue.

There you have it, a very short and simple overview of ransomware in 2017 – if you want to know more on any of the three above steps, feel free to get in contact, or leave me a comment below.

Purge deleted users from Office 365 (O365)

On occasion you may have to force a deletion of a user, or perhaps a user has been deleted but you need to assign that old email address to someone else.

This is when you need to purge deleted users from Office365.

To do so you need to open up powershell and connect to your office 365 tennancy – you can use connect-msolservice to do so,

Next check which deleted users are currently in the recycle bin:

Get-MsolUser -ReturnDeletedUsers

If there is only one, or you wish to remove all users that have been listed:

-ReturnDeletedUsers | Remove-MsolUser -RemoveFromRecycleBin -Force

If you only want to delete and purge a single user from the Recycle bin – you can use the below:

-ReturnDeletedUsers |Remove-MsolUser -UserPrincipalName “[user’s email address]” -RemoveFromRecycleBin -Force

Sorted, you can now re-use the smtp address or recreate the user. for other ways to Purge deleted users see future posts.

Change a computer name remotely – [SOLVED] Using CMD and psexec

There are multiple reasons you may wish to change a computer name remotely – here is one method:

I’m going to be using psexec to do this, if you don’t have it already, this great wee remote command tool is provided free from the SysInternalsSuite – or can be obtained on its own here.

Open a command prompt from whichever folder psexec.exe is in.

The command we are going to be using to change the computer name is the below wmic command:

WMIC computersystem where caption='currentname' rename newname

Put together with psexec it will looks something like this:

psexec \\PC_NAME_OR_IP -u "USERNAME HERE" -p "PASSWORD" WMIC computersystem where caption='CURRENT_NAME' rename NEW_NAME

Exchange usernames and pc names as appropriate.

There is a couple of great sites with all the psexec switches, ss64 is my favorite.
Now you can change a computer name remotely

Acronis error 1603 [SOLVED]

So I have been installing alot of Acronis Agents recently, and three times i have come across Acronis error 1603.

Whilst there is lots of different info out there to try to resolve this issue, i have found one that has worked every time in multiple different environments. Lets get straight to it:

To solve Acronis error 1603:

Simply run the cleanup tool. It can be found here:

http://dl.acronis.com/u/support/abr_cleanup_h.exe

And run it from administrative CMD using the following command:
abr_cleanup_h.exe --clean

Hope it helps, if it does, let me know!

Change the username in O365 when syncing with onsite active directory

When creating a new user in Office365 with a hybrid or active directory syn’d setup it is quite common for Office365 to append the .onmicrosoft.com domain to any new address you set up.

This unfortunately cannot be changed by means of GUI, you need to change the username in O365 using powershell.

To change the username in Office 365: 

1. Make sure you have the WAAD module
2. Run PowerShell
3. Type “Connect-MsolService” –> ENTER. Enter your admin credentials for Office 365 –> OK
4. Use the below command to update the primary email address used to log in exchanging parts in bold;

"Set-MsolUserPrincipalName -UserPrincipalName current_email@****.onmicrosoft.com –NewUserPrincipalName new_email@domain"  

Nice and easy 🙂

DynDNS on Sonicwall – ‘dyn.com’ reports account config error or invalid parameters for domain

DynDNS on Sonicwall is a great thing – When it works

There are multiple reasons why you may be wanting to use DynDNS on Sonicwall sonicOS platform, but that is another discussion.

The problem i encountered in ALL versions of sonicOS since firmware version 5.9 is this “account config error or invalid parameters for domain”.
I finally found the resolution was to do with Dyn.com changing their root CA certificate, which SonicWALL firewall has not installed yet.

Solution to fix the dynamic DNS is pretty simple, we just need to import the new certificate to the Sonicwall. the Below is copied from Sonicwall’s KB article link:
https://support.sonicwall.com/kb/sw11246
Resolution or Workaround:

Right click the link below and save Baltimore CyberTrust Root CA certificate to your local drive. Then import it into SonicWALL Certificate section.

https://cacert.omniroot.com/bc2025.crt
 

Steps:

1) Login to your SonicWALL Management
2) Navigate to Network -> Dynamic DNS, on the right side delete DynDNS profile which was already created.

3) Navigate to System -> Certificates, on the right side click Import Button.

  • Select Import a CA certificate from a PKCS#7 (.p7b), PEM (.pem) or DER (.der or .cer) encoded file radio button and Click Choose File button.
  • Select bc2025 certificate file(which you downloaded from above link) from your local drive and click Open button.

        [Note:While importing bc2025.crt you might get warning as unsupported format but you can Ignore it]

  • Click Import button in Import Certificate window and you can see the Baltimore CyberTrust Root CA in SonicWALL Certificates.

 
4) Restart your SonicWALL and create new profile for DynDNS under Network -> Dynamic DNS by clicking Add button

Now you can see DynDNS as Online​ with updated public IP.


Hope this helps someone!