• Change the username in O365 when syncing with onsite active directory

    When creating a new user in Office365 with a hybrid or active directory syn’d setup it is quite common for Office365 to append the .onmicrosoft.com domain to any new address you set up.

    This unfortunately cannot be changed by means of GUI, you need to change the username in O365 using powershell.

    To change the username in Office 365: 

    1. Make sure you have the WAAD module
    2. Run PowerShell
    3. Type “Connect-MsolService” –> ENTER. Enter your admin credentials for Office 365 –> OK
    4. Use the below command to update the primary email address used to log in exchanging parts in bold;

    "Set-MsolUserPrincipalName -UserPrincipalName current_email@****.onmicrosoft.com –NewUserPrincipalName new_email@domain"  

    Nice and easy :)


  • DynDNS on Sonicwall – ‘dyn.com’ reports account config error or invalid parameters for domain

    DynDNS on Sonicwall is a great thing – When it works

    There are multiple reasons why you may be wanting to use DynDNS on Sonicwall sonicOS platform, but that is another discussion.

    The problem i encountered in ALL versions of sonicOS since firmware version 5.9 is this “account config error or invalid parameters for domain”.
    I finally found the resolution was to do with Dyn.com changing their root CA certificate, which SonicWALL firewall has not installed yet.

    Solution to fix the dynamic DNS is pretty simple, we just need to import the new certificate to the Sonicwall. the Below is copied from Sonicwall’s KB article link:
    https://support.sonicwall.com/kb/sw11246
    Resolution or Workaround:

    Right click the link below and save Baltimore CyberTrust Root CA certificate to your local drive. Then import it into SonicWALL Certificate section.

    https://cacert.omniroot.com/bc2025.crt
     

    Steps:

    1) Login to your SonicWALL Management
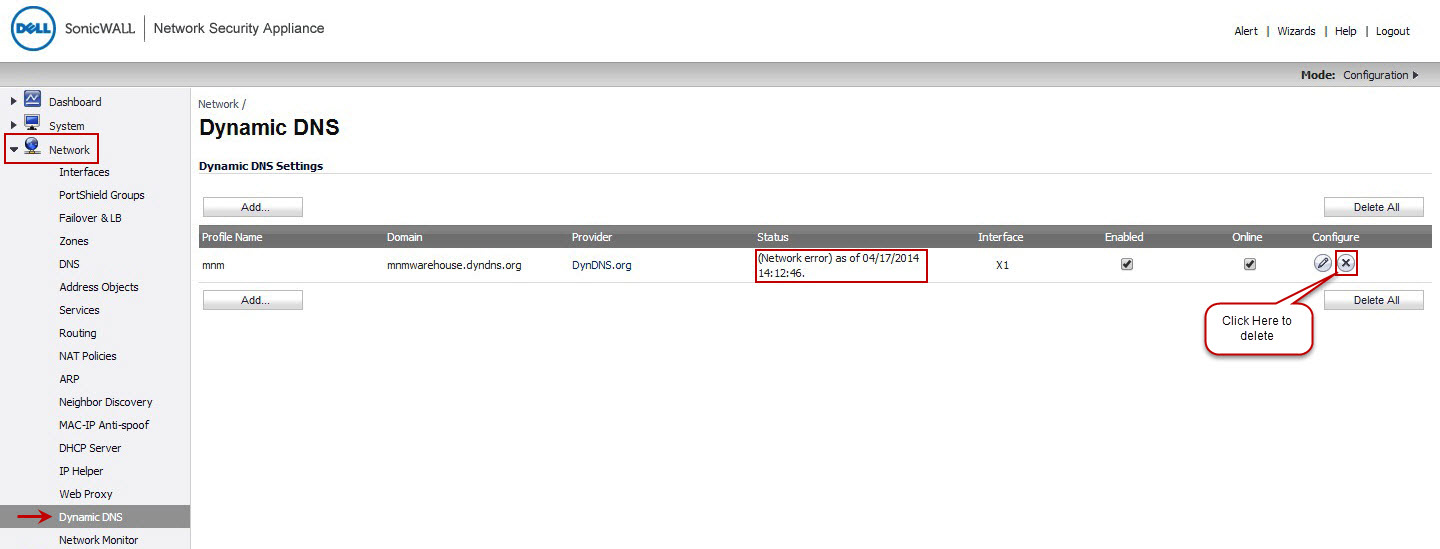
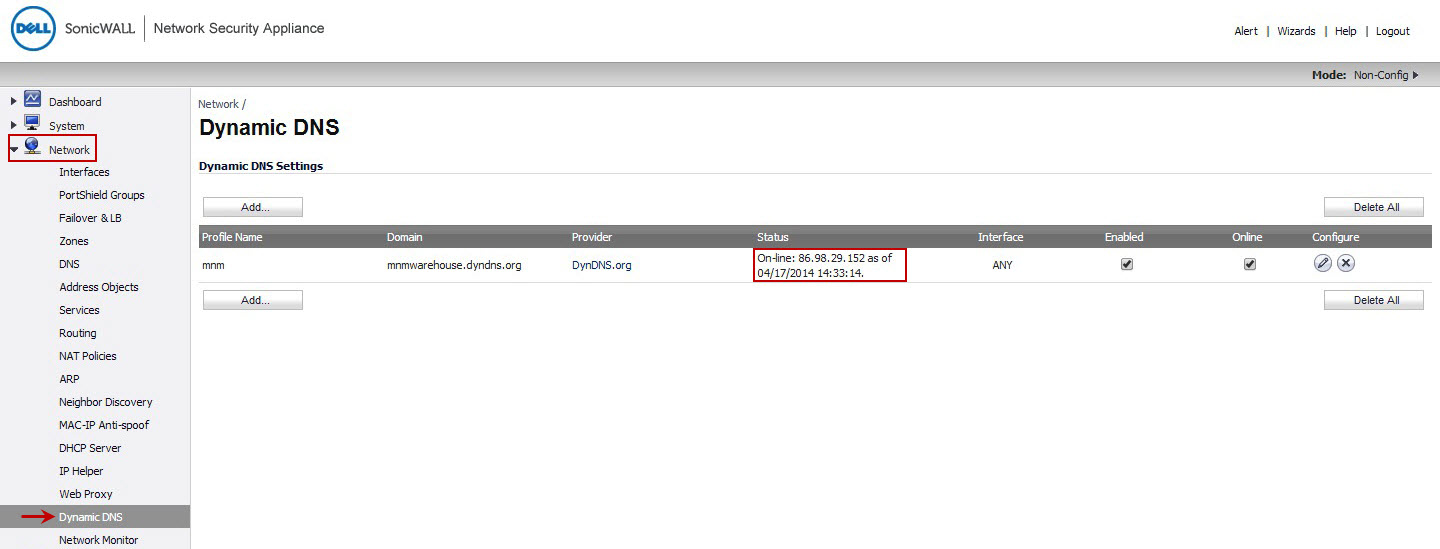
    2) Navigate to Network -> Dynamic DNS, on the right side delete DynDNS profile which was already created.

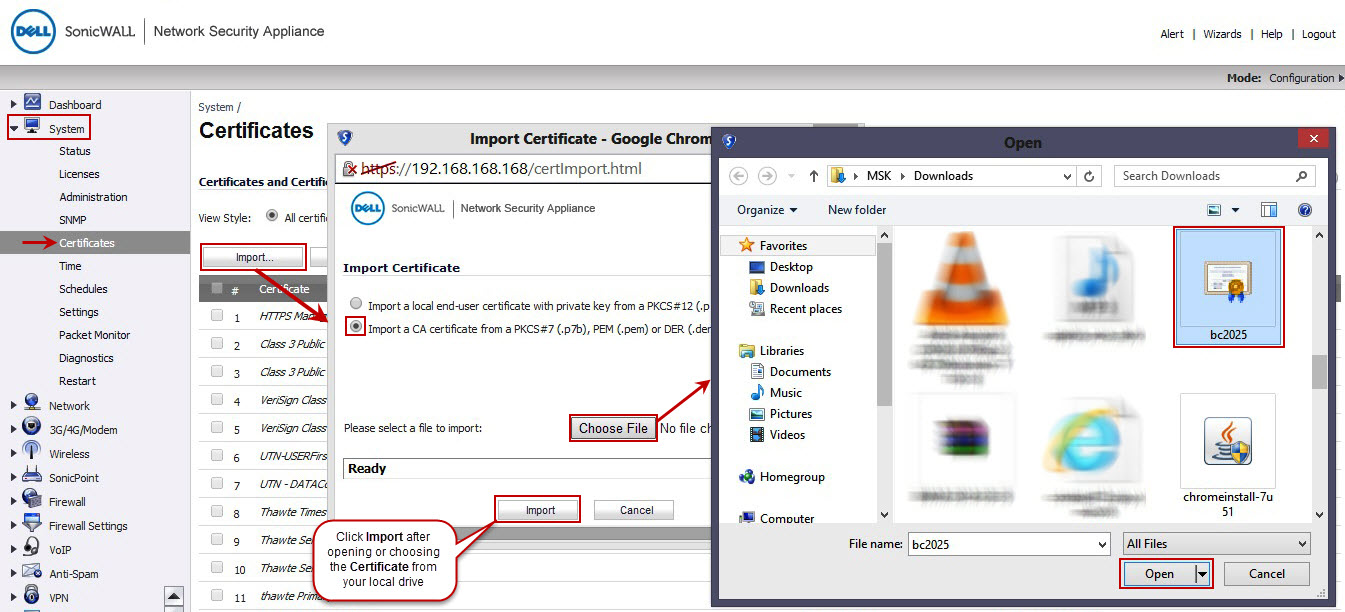
    3) Navigate to System -> Certificates, on the right side click Import Button.

    • Select Import a CA certificate from a PKCS#7 (.p7b), PEM (.pem) or DER (.der or .cer) encoded file radio button and Click Choose File button.
    • Select bc2025 certificate file(which you downloaded from above link) from your local drive and click Open button.

            [Note:While importing bc2025.crt you might get warning as unsupported format but you can Ignore it]

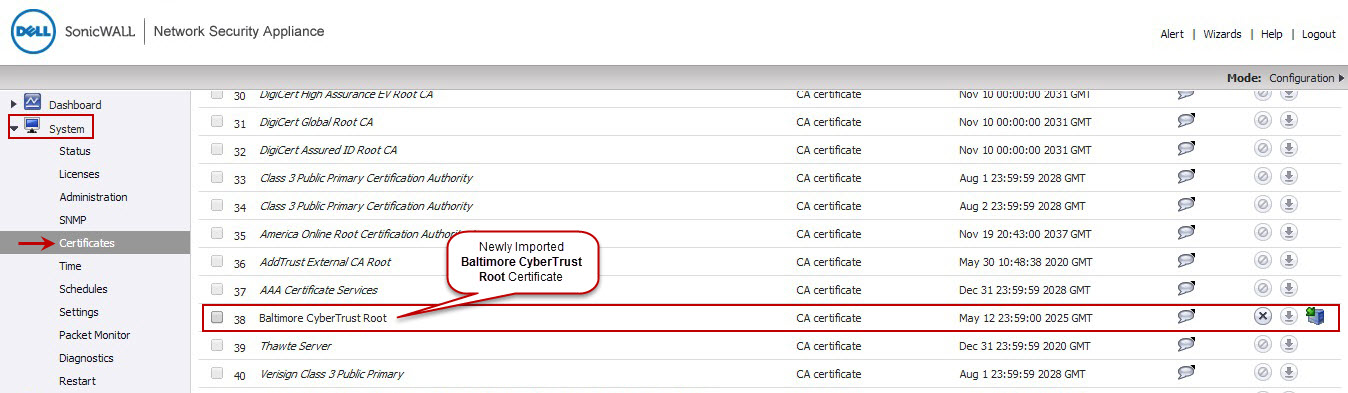
    • Click Import button in Import Certificate window and you can see the Baltimore CyberTrust Root CA in SonicWALL Certificates.

     
    4) Restart your SonicWALL and create new profile for DynDNS under Network -> Dynamic DNS by clicking Add button

    Now you can see DynDNS as Online​ with updated public IP.


Hope this helps someone!


  • How to change the RDP port on a RDS server

    There are many reasons you may wish to change the RDP port on a RDS or terminal services server.

    Change RDP port number

    My default action when setting up a new RDS server is now to ensure that it is not listening on the standard port (3389). This is for multiple reasons, mainly though to add a small extra layer of protection against automated RDP bruteforce attacks. Sure if an attacker wanted to they could run a port scan to find the new port, but really unless you are targeted, no-one is going to do this via bot/automation.

    The easiest way to change the RDP port is via regedit:

    Navigate to:

    HKEY_LOCAL_MACHINE\System\CurrentControlSet\Control\Terminal Server\WinStations\RDP-Tcp\

    and change the value of the DWORD "PortNumber" select Decimal and change to whatever you wish the port to be.

    You will then need to restart the server for this to take effect – simply restarting the gateway services does not seem to refresh the listening port.

    Other option is to put this into a .reg file and simply click on it to merge the rdp port change into the registry. To do this, copy the below script into notepad and save it is a .reg file:

    Windows Registry Editor Version 5.00

    [HKEY_LOCAL_MACHINE\SYSTEM\CurrentControlSet\Control\Terminal Server\WinStations\RDP-Tcp]
    "PortNumber"=dword:0000846c

    This will change the port to 33899


  • [SOLVED] Java update “Failed to download required installation files.”

    There have been a few occasions recently where a Java update fails


    Java Update failed to download the required files

    Having looked about for a solution, there is two methods that i have found to quickly rectify the problem.

    1) The cheats way.
    Re-install java on top of itself.

    NB, Java has many different versions depending on which OS and update version of the OS you are using, the quickest way to re-install with the latest version i have found is to use Ninite. This will find version and install it correctly for you.
    https://ninite.com/java8/

    2) Edit compatibility settings on the Java updater.

    go to: %PROGRAMFILES%\Common Files\Java\Java Update

    and find jucheck.exe (updater)

    right click --> Properties --> Compatibility

    select the tick box to run with a previous version of windows, anything before Vista seems to do the job. (XP, Win95 etc…) As this is just the updater and not java, it ensures you still get the correct version.

    BONUS 3)
    This seems to be an issue with privilege elevation in windows – if you have access to an admin account, then you can log into that then try updating 8/10 it works without the above.


  • Latest Posts: _