Stop “installing” autonomous AI agents on your daily driver. You are doing it wrong. Our hero, Jolty (Zoë Roth AKA Disaster Girl) being told to ‘gonnae no dae that!’ a beautiful Scottish expression (please don’t do that) as a fire blazes in the background. This phrase perfectly sums up my feelings on MoltBot and the…
Sometimes in the IT world you just need to let off some steam – sometimes a pile of old PC’s through in the PC ‘Graveyard’ are a fun way to do so.
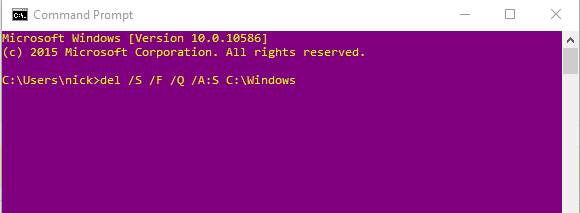
Often we will play with various ways to kill off old PC’s before they are then securely wiped and recycled, and this command we are about to go into is one of the basics.
del /S /F /Q /A:S C:\windows
Thats it.
Yes it really is that easy to kill a windows PC!
Lets go through it and some of the pitfalls you may find.
del – This is the windows command to delete an object, pretty self explanatory /S – Deletes specified files from the current directory and all subdirectories. Displays the names of the files as they are being deleted. /F – Forces deletion of read-only files. /Q – Specifies quiet mode. You are not prompted for delete confirmation. /A:S – Deletes files based on the following file attributes, in this case: s = System files C:\windows – The destination we are deleting.
Why does this work? – Well most people reading this know already, but if you didn’t – the Windows folder simply put is the heart of the Windows operating system. Killing it will stop the OS from booting.
Most users readers will be asking “Why put the C:\Windows” at the end of the script, should it no logically be put in front of the other switches? Well this is to do with personal preference really, and to do with the fact that it is convinient to then go about and delete more contect using the same script, by hitting up arrow, then simply backspacing and changing your destination. Lazy much? You bet you!
Bonus post of to Kill a Windows PC and to make this more effective coming next week – little hint: takeown /f C:\Windows /r /d y
p.s. This is for information only – be responsible!
Most likely when you are updating, upgrading or restarting a section of a program. Exchange is a prime culprit of this, hanging information stores and the likes. So;
To kill the service you have to know its PID (Process ID). Finding this is easy in an administrative command prompt:
1: lookup the process ID
sc queryex *service name*
(Hint: you can find the service name by loading up services.msc and then opening the services properties dialog)
Step 2: Identify the PID
Halfway down the list will be the services associated PID
Step 3: kill the process with the taskkill command
taskkill /f /pid *PID*
This will force kill the hung service, which you can then re-start in services.msc
There is the odd occasion that you may need to change the allowed message size limits in exchange, either to send or to receive – below we look specifically at self hosted Exchange 2016
First, open up Exchange powershell, and and enter any required domain credentials.
Next we are going to view the current message limits on the server by the following multiline command:
get-transportconfig | ft maxsendsize, maxreceivesize

get-receiveconnector | ft name, maxmessagesize

get-sendconnector | ft name, maxmessagesize

get-mailbox Administrator |ft Name, Maxsendsize, maxreceivesize
Once armed with this information we can proceed to string together a command in order to get the desired messages allowed through the system. The main command is the below:
get-transportconfig | Set-TransportConfig
This calls the transport layer configurations and allows you to pipe changes to it. Next we have the different set commands for different limits;
From the above, you can pick and choose what you need to change the message size limits, as in the example, this will set ALL connectors ingoing and outgoing to 30MB. The full command will look something like the below:
![[Opinion] STOP INSTALLING OPENCLAW (MOLTBOT) ON YOUR PC/MAC: How to Safely ‘Hire’ AI Agents via Cloud VPS](https://cannotdisplay.com/wp-content/uploads/2026/02/moltbot-banner-1024x435.png)
![[Solved] Help! Windows 365 Cloud PC Switch Feature Has Frozen My Local Host PC.](https://cannotdisplay.com/wp-content/uploads/2025/12/Win365-Cloud-PC-via-Switch-1024x214.png)