[Solved] Clicking on Tailscale icon does not let me login

Occasionally i have come accross a Tailscale client that does not initially want to display the log in page.

I originally also tried running CLI commands like “tailscale up –authkey xxxxxxxxxx” as well – it seems to hang.

tailscale login icon in taskbar

So when CLI and clicking on the icon in the taskbar via the GUI to log in doesn’t work – Check your network cards!
This is usually caused when Tailscale cannot tell which network card has priority.

On Windows:

Win + R //to open run
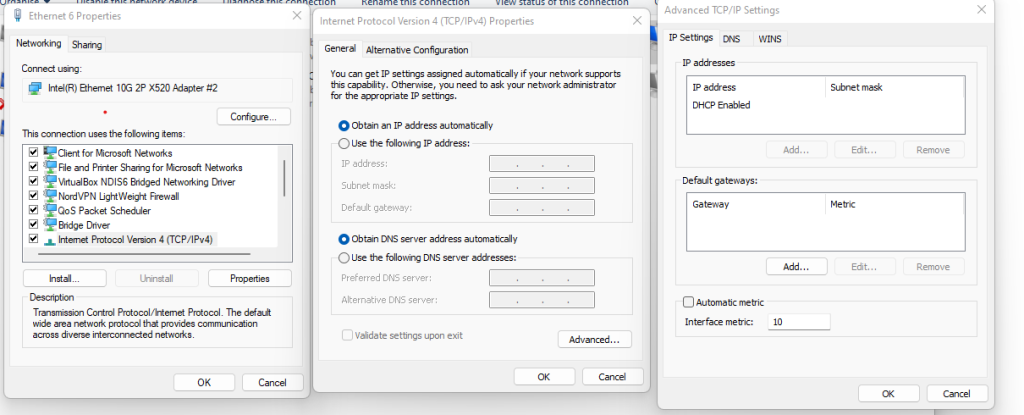
ncpa.cpl //to open the network settings
Select main network card
Open Properties, then IPv4
Click on Advanced, untick ‘Automatic Metric
Set to 10.

setting network card interface metric to solve tailscale issues

Try again. Chances are, tailscale will now let you login and generate the login page popup allowing sign on. Authkey authentication should also now work.

tailscale login screen in browser

[SOLVED] Manually Register Acronis Backup Client for Backup Cloud

Manually Register Acronis Backup

Occasionally a backup client will disconnect, or cannot connect in the first place to obtain its backup set and process its jobs.
With pre-provisioning systems, this is often the case for certainly Mac and Linux machines.

Solution

(!) IMPORTANT: This method is NOT supported for registration of Agent for VMware (Windows)

Manually Register Acronis Backup client.
Use quotation marks, if your password contains special characters or spaces.

Windows OS
1. Open Command prompt and navigate to C:\Program Files\BackupClient\BackupAndRecovery: 
cd “C:\Program Files\BackupClient\BackupAndRecovery”
2. Issue this command to register the client machine: 
register_msp_mms.exe register https://cloud.acronis.com 

Linux OS
1. Open terminal as root user
2. Type in the following command to register the agent:
/usr/lib/Acronis/BackupAndRecovery/AmsRegisterHelper register https://cloud.acronis.com 

OS X
1. Open terminal.
2. Execute:
sudo -u root “/Library/Application Support/BackupClient/Acronis/BackupAndRecovery/AmsRegisterHelper” register https://cloud.acronis.com 

From

NB: if you are outwith the normal Acronis Data Centres, as i was, then replace the cloud.acronis.com URL with the URL you use to log into your dashboard. i.e. https://eu-cloud.acronis.com

Acronis error 1603 [SOLVED]

So I have been installing alot of Acronis Agents recently, and three times i have come across Acronis error 1603.

Whilst there is lots of different info out there to try to resolve this issue, i have found one that has worked every time in multiple different environments. Lets get straight to it:

To solve Acronis error 1603:

Simply run the cleanup tool. It can be found here:

http://dl.acronis.com/u/support/abr_cleanup_h.exe

And run it from administrative CMD using the following command:
abr_cleanup_h.exe --clean

Hope it helps, if it does, let me know!

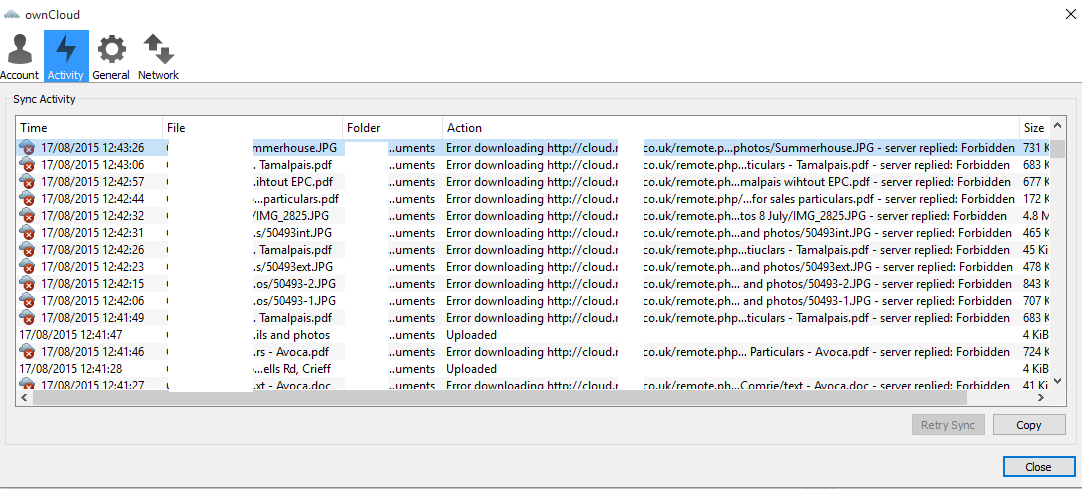
ownCloud server replied: Forbidden (ownCloud Forbidden)

I recently installed the latest version of ownCloud. A self hosted cloud platform for syncing all your favourite documents and files you may need to access from elsewhere.

The install was easy enough – See other post – however i did then encounter a few issues when using the Windows sync software,

Here is what i had to do to fix a: “ownCoud server replied: Forbidden” ownCloud Forbidden error.

(Well hopefully it works for you also! )

ownCloud Forbidden

I had to do 2 things in order to get this installed:

The first error i got was;
“download of ownCloud source file failed.
SSL certificate problem: self signed certificate in certificate chainSSL certificate problem: self signed certificate in certificate chain”

The solution i found here was to add the below into my installer.php :

curl_setopt($ch, CURLOPT_CERTINFO, FALSE);
curl_setopt($ch, CURLOPT_SSL_VERIFYPEER, FALSE);

This allowed me to start the install, and then supply it with my DB creds and table to get started.

The second error, was only once i had set up my default file structure using the web interface and finally installed the desktop based client was the aforementioned ownCloud Forbidden error.

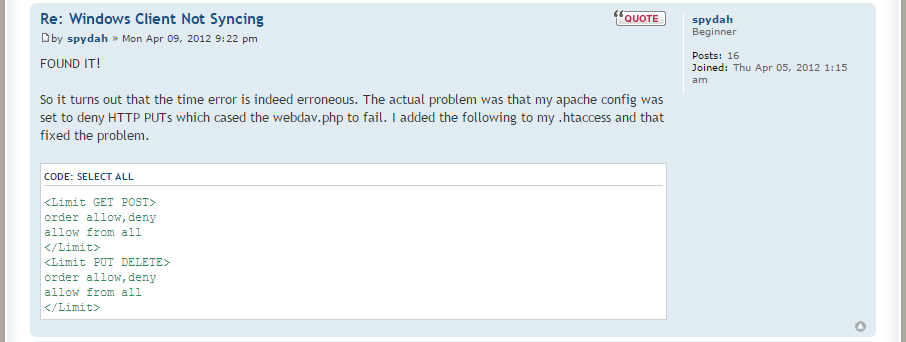
The solution? After endless hours of scrolling through countless Forums and the full ownCloud documentation;

ownCloud Forbidden Spydah


In plain text, to show spydah’s fix to an ownCloud Forbidden error:

Simply add the following to your .htaccess file:

<Limit GET POST>
order allow,deny
allow from all
</Limit>
<Limit PUT DELETE>
order allow,deny
allow from all
</Limit>


Done. Sorted. finally!

Resolve Logmein Error 4320 (Method 2)


Another way to resolve Logmein Error 4320 

As discussed in my previous article on this logmein issue, this error code is most commonly found in a domain environment, or where there may be some form of user lockdown, and may even occur on a multi user non domain PC.

Basically, it is meant to protect the users PC from being accessed by someone other than the logged in user who installed logmein in the first place.

  1. First off, lets open up the logmein Control Panel (Right-Click on the logmein icon in the taskbar, or open from the start menu)
    Add users logmin
  2. Next we are going to select ‘Options’
    Add users logmin
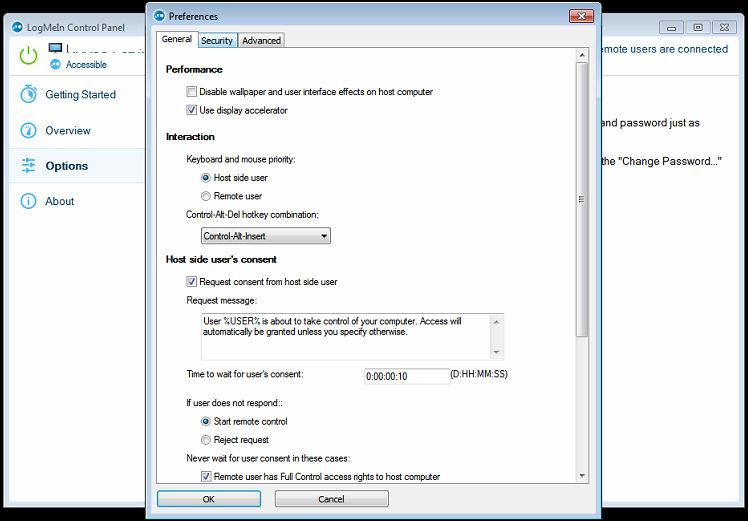
  3. Then ‘Preferences’
    logmein properties
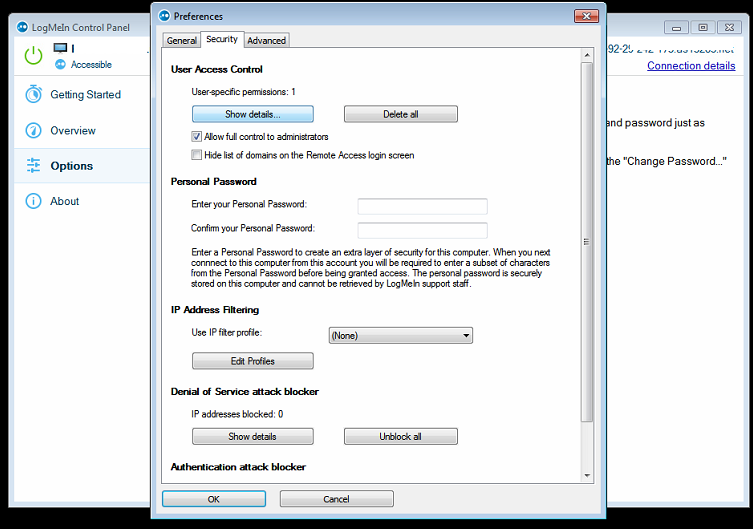
  4. Select the ‘Security tab’
    logmein properties
  5. Click on ‘Show Details’
    Error 4320
  6. Click on  Browse and select the correct user you want to add to allow access to the PC. You can choose from a list either by selecting the local PC name, or if you are on a domain, then the domain name that the PC is registered with.
    Logmein Error 4320
  7. Click OK to close all windows, Turn off Logmein then turn it back on,
  8. You are good to go!


Preventative measures could be taken however, When installing logmein, if you do so whilst logged in as a local admin for the PC, this seems to resolve the issue. Please note, this is only for the LOCAL admin for the PC, a domain admin account will most likely not work, and provide the same Logmein error 4320 as discussed above.

Resolve Logmein Error 4320 (Method 1)

How to resolve Logmein Error 4320 

Whilst setting up logmein for remote access in a pretty locked down domain environment, I have noticed that quite frequently we would get an ‘admin error 4320’ on the remote users PC.

Now the official logmein site would suggest adding users within the logmein interface, which we will cover in ‘Method 2’ however I have found a quicker workaround that works 9 out of 10 times is by simply always running the program as administrator.

  1. Place the Logmein icon either on your desktop or navigate to the program folder path usually “C:\Program Files (x86)\LogMeIn Ignition”
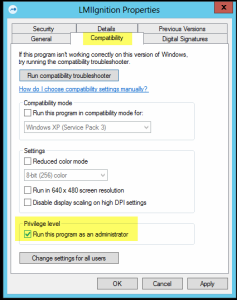
  2. Right click on the icon and select ‘Properties
  3. Once in Properties select the ‘Compatibility’ tab at the top
  4. At the bottom under ‘Privilege level’ tick the ‘Run this program as Administrator’ box*.
    How do I resolve Error 4320
  5. If you have more than 1 user on the PC, select ‘Change settings for all users’
  6. Again tick the ‘Run this program as Administrator’ box
    Logmein Error 4320
  7. OK out of both windows, If logmein is running. Close it again and re-open it, now using an Administrative logon.

Your Logmein error 4320 should now be resolved. if not see the link below

Logmein Error 4320 Method 2

*If the ‘Privilege level’ box is greyed out, be sure that you are logged on as an administrative user, or log off and back on as one in order to continue.